

Long division is a method for splitting a large number into equal groups by working through it one digit at a time. The process always repeats the same four steps: Divide, Multiply, Subtract, Bring down. You cycle through those four steps for every digit in the number until nothing is left to bring down. Once you see the pattern, try it yourself on a real problem below.
TL;DR:
- Proper column alignment is crucial for accuracy, as misaligned digits can cause errors in subtraction and produce incorrect remainders.
- When dividing by two-digit numbers, estimation through rounding the divisor helps prevent overshooting or undershooting the quotient.
- Zeroes in the quotient must be explicitly written when the divisor does not fit into the current number, avoiding silent errors that skew the final answer.
- Using color-coded steps and visual aids helps students distinguish each part of the process, leading to faster mastery and fewer mistakes.
- Practicing with structured worksheets that isolate each step improves long division fluency and reduces reliance on mental math early in learning.
Table of Contents
- What Are the Parts of a Long Division Problem?
- How Do You Do Long Division Step by Step?
- Two Worked Examples That Show Every Step
- Short Division vs. Long Division: Which Should You Use?
- What Mistakes Should You Watch For?
- Practice Resources That Build Each Step
- How Do You Divide by a Two-Digit Divisor?
- How Do You Handle a Zero in the Quotient?
- Setting Up a Long Division Problem Correctly
- Why Visual Steps and Color-Coding Speed Up Mastery
- Get Structured Practice With Edhed Learning Worksheets
- Where to Learn More About Long Division
- Sources
What Are the Parts of a Long Division Problem?
Before you can follow long division steps, you need to know what you are looking at. Every division problem has four parts, and each one has a job:
- Dividend: the number being split up (it sits inside the division bracket)
- Divisor: the number doing the splitting (it sits outside, to the left)
- Quotient: the answer, written on top of the bracket
- Remainder: whatever is left over when the dividend does not split evenly
The setup itself is often called a “bus stop” because the bracket looks like a little shelter with the dividend waiting inside it. This layout, with the divisor to the left and the quotient on top, became the standard way to write division in English-speaking classrooms centuries ago, and it still works because it keeps every digit lined up in its correct place value column. Keeping columns straight matters more than almost anything else in this method. One handy way to double check your work once you finish: Dividend = Divisor × Quotient + Remainder. If that equation doesn’t balance, something went wrong somewhere in the steps.
How Do You Do Long Division Step by Step?
The Math Is Fun mnemonic for this is “Dad, Mom, Sister, Brother,” standing in for Divide, Multiply, Subtract, Bring down. It sticks because the order never changes, no matter how big the dividend gets.
Here is what each step actually asks you to do:
- Divide. Look at the smallest group of digits on the left of the dividend that your divisor can go into at least once. For a one-digit divisor, that is often just the first digit; for a divisor like 42, you might need the first two or three digits before the number is big enough.
- Multiply. Take the digit you just wrote in the quotient and multiply it by the divisor. Write that product directly underneath the digits you were dividing.
- Subtract. Subtract the product from the digits above it. The result has to be smaller than your divisor. If it isn’t, your quotient digit was too small, and you need to go back and raise it.
- Bring down. Drag the next digit of the dividend down next to your subtraction result, forming a new number, and start the cycle again with Divide.
You repeat that loop until there are no more digits to bring down. Whatever number is left at the very end is your final remainder.
Picking the right quotient digit at each pass is really an estimation skill. Ask yourself: what’s the biggest number I can multiply by the divisor without going over the number I’m looking at? Students often guess low at first, which is fine. Guessing low just means you subtract, get a small remainder, and can nudge the digit up before moving on. Guessing high causes a negative number, which is your signal to lower the digit.
Two checks keep this method honest at every stage:
- The remainder after each subtraction must always be smaller than the divisor. If it isn’t, the quotient digit you chose was too small, and increasing it by one usually fixes the problem without touching any earlier work.
- Your final remainder must also be smaller than the divisor. A remainder equal to or bigger than the divisor at the very end means a step earlier in the problem needs a second look.
Pro Tip: Before you divide, round the divisor and the digits you’re working with to the nearest friendly number. Dividing 39 by 6? Think “about 40 divided by 6 is close to 6 or 7,” then test it. Rough estimation like this, a favorite trick among teachers who focus on this exact skill, saves you from wildly overshooting or undershooting your quotient digit.
Two Worked Examples That Show Every Step
Seeing the steps written out solves more confusion than any explanation can. Here are two examples, one short and one longer, worked all the way through.
Example 1: 95 ÷ 7
- Divide: 7 goes into 9 one time. Write 1 above the 9.
- Multiply: 1 × 7 = 7. Write 7 below the 9.
- Subtract: 9 − 7 = 2.
- Bring down: bring down the 5, making 25.
- Divide again: 7 goes into 25 three times (3 × 7 = 21, and 4 × 7 = 28 is too big).
- Multiply: 3 × 7 = 21. Subtract: 25 − 21 = 4.
No more digits remain, so the final answer is 13 remainder 4, or written as a mixed number, 13 and 4/7. Checking it against the division and sharing worksheets format Edhed Learning uses in its practice packs, this is exactly the kind of problem built to build early confidence with remainders and fractions.
Example 2: 157 ÷ 4
- Divide: 4 goes into 15 three times. Multiply: 3 × 4 = 12. Subtract: 15 − 12 = 3.
- Bring down the 7, making 37. Divide: 4 goes into 37 nine times. Multiply: 9 × 4 = 36. Subtract: 37 − 36 = 1.
The answer is 39 remainder 1. Want a decimal instead of a remainder? Add a decimal point after the 39, bring down a zero, and keep dividing: 10 ÷ 4 = 2 remainder 2, giving you 39.2, then bring down another zero and repeat until you hit the precision you need or the pattern starts repeating.
Short Division vs. Long Division: Which Should You Use?
Short division is a compressed version of the same idea, usually reserved for single-digit divisors. You skip writing out the multiplication and subtraction on paper and instead carry the remainder in your head to the next digit.
- Use short division once multiplication facts are automatic and the divisor is a single digit, since it saves time on simple problems.
- Use long division for anything with a multi-digit divisor, or whenever mental multiplication still feels shaky, since writing every step out catches mistakes before they compound.
Most classrooms teach long division first for good reason. Short division only becomes a reliable shortcut once a student has already built confidence with the full written method. Skipping straight to the shortcut tends to produce shaky results later on harder problems.
What Mistakes Should You Watch For?
Most long division errors trace back to one of three habits, and all three are fixable in under a minute.
- Check your columns. If digits drift out of their place value column, the whole subtraction step becomes meaningless. Line everything up before you multiply.
- Check your remainder. After every subtraction, ask: is this smaller than my divisor? If not, your quotient digit needs to go up by one, and you redo just that subtraction, not the whole problem.
- Check your multiplication. A single wrong multiplication fact throws off every step that follows it, so it is worth double checking before you subtract.
Pro Tip: When you spot an error, resist the urge to erase the whole problem. Fix only the digit where the mistake happened, then redo the steps below it. Restarting from scratch wastes time and often introduces a brand new mistake.
Practice Resources That Build Each Step

The fastest way to lock in long division steps is to separate practice into stages instead of jumping straight to timed drills. A Division & Sharing digital course and worksheets resource walks through each of the four steps with dedicated space to write out the divide, multiply, subtract, and bring down stages individually, so a student never has to guess what belongs where.
Two companion resources round out the sequence:
- Multiplication: What It Really Means builds the multiplication fluency long division depends on, and it pairs well with a times tables refresher for students who still hesitate on basic facts.
- 4th Grade Math Worksheets offers broader grade-level practice once a student has division steps under control and needs mixed review.
A simple sequence works best: watch a demonstration, work through a guided worksheet together, then move to independent timed practice.
How Do You Divide by a Two-Digit Divisor?
Two-digit divisors trip up more students than any other part of long division, mostly because the “Divide” step now requires estimating a multiplication fact instead of just knowing it.
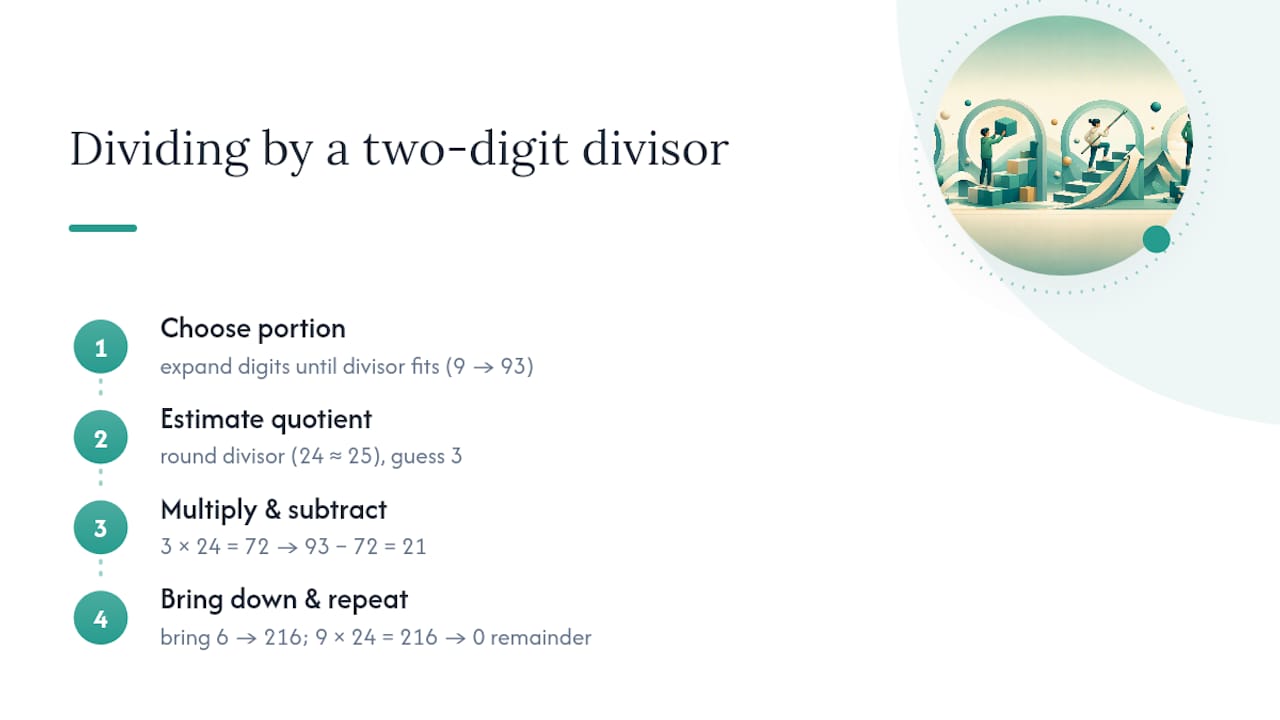
Take 936 ÷ 24. First, decide how much of the dividend you need before 24 fits at least once. 9 is too small, so look at 93. 24 goes into 93 about three times (3 × 24 = 72, and 4 × 24 = 96 is too big). Write 3 on top. Multiply: 3 × 24 = 72. Subtract: 93 − 72 = 21. Bring down the 6, making 216. Now divide again: 24 goes into 216 exactly nine times (9 × 24 = 216). Multiply and subtract, and you land on zero. The final answer is 39, with no remainder.
The estimating gets harder here because you cannot always eyeball a two-digit multiplication the way you can a one-digit fact. A useful shortcut is rounding the divisor: treat 24 as “about 25” and ask how many 25s fit into your current number, then test that guess against the real divisor. This is exactly the gradual approach GeeksforGeeks recommends for multi-digit divisors, introducing them only after single-digit division feels automatic. Rushing a student into two-digit divisors before they are ready is one of the most common reasons long division starts to feel impossible instead of just tricky.
How Do You Handle a Zero in the Quotient?
Zeros in the quotient confuse students because it feels like a step got skipped, but nothing actually gets skipped. It happens whenever the divisor does not fit into the current number even once.
Try 432 ÷ 4. Divide: 4 goes into 4 once. Multiply and subtract, leaving 0. Bring down the 3, making 3. Here is the catch: 4 does not go into 3 at all. When that happens, you still write a 0 in the quotient for that position, then bring down the next digit anyway. Bring down the 2, making 32. Now divide: 4 goes into 32 exactly eight times. The final quotient is 108.
Skip the zero, and the quotient collapses into 18, which is wrong by a wide margin. That single missing placeholder digit is one of the most common silent errors in long division, because the problem still looks like it’s progressing normally. The fix is a habit, not a trick: every time you bring down a digit, you must write something in the quotient before moving on, even if that something is a zero.
Setting Up a Long Division Problem Correctly
Getting the setup right prevents most of the errors students run into later. The divisor always goes outside the bracket, to the left. The dividend goes inside the bracket, and the quotient builds up on top, one digit at a time, directly above the digit or digit group you are currently working with.
Alignment inside the bracket is where most young learners lose points, even when their math facts are solid. Each digit you write in the quotient needs to sit above the last digit of the number you just divided into, not above the first digit of the whole dividend. When you multiply and write the product underneath, that product also needs to line up under the correct digits, ones under ones, tens under tens. A strong sense of place value makes this alignment almost automatic, because the student already understands why a 3 in the tens column means something different from a 3 in the ones column.
Graph paper or lined paper turned sideways can help enormously here, since it forces every digit into its own column. Once the setup is solid, everything downstream, the dividing, multiplying, subtracting, and bringing down, becomes far less error prone.
Why Visual Steps and Color-Coding Speed Up Mastery
Long division rewards students who can see the four steps as distinct, repeatable chunks rather than one long blur of arithmetic. Color-coding each step, or working through a printed anchor chart before touching a timed worksheet, cuts down on the alignment errors that cause most wrong answers. It also matches what researchers have found about fractions and division skill predicting later math achievement: the earlier a student gets comfortable with this process, the smoother later math tends to go.
— Shaun
Get Structured Practice With Edhed Learning Worksheets
Once you know the steps, the fastest path to fluency is repetition with a clear format in front of you, not another blank page. A Division & Sharing digital course and printable worksheets resource gives students dedicated space for each of the four steps, so practice looks exactly like the worked examples above instead of forcing a student to invent their own layout under pressure.

If multiplication facts are still shaky, start with Multiplication: What It Really Means before tackling harder divisors, since a slow multiplication fact will slow down every single division step built on top of it. For families and teachers who want broader grade-level coverage beyond division alone, the 4th Grade Math Worksheets pack rounds out practice with mixed review problems. Try a free sample worksheet first to see the step-by-step format in action, then pick up a full pack when you’re ready for structured practice sets.
Where to Learn More About Long Division
- Math Is Fun: clear breakdown of the four-step mnemonic
- Khan Academy: video walkthroughs for visual learners
- Wikipedia: notation history and the verification formula
Sources
- Long division — Wikipedia
- Long division — Math is Fun
- Long division — GeeksforGeeks
- Intro to long division (no remainders) — Khan Academy


