

An area model is a rectangle diagram that turns multiplication into a visual sum of smaller areas. Each factor gets split into place-value parts, laid out along the sides of the rectangle, and each inner box shows one partial product. Most teachers introduce it around third and fourth grade as a bridge to the standard algorithm, because it makes place value and the distributive property visible instead of abstract.
TL;DR:
- A correct area model must include all four boxes for a 2-digit by 2-digit multiplication problem, ensuring partial products are not omitted.
- Labeling each box with its multiplication fact before calculating helps prevent errors and deepen understanding of the partial product process.
- Using the area model to visualize binomial expansion links elementary multiplication to algebra, reinforcing long-term mathematical reasoning.
- Employing visual tools like simulations combined with physical manipulatives enhances comprehension and supports diverse learning needs.
- Transitioning from the area model to the standard algorithm should be gradual, ensuring students can explain their reasoning before increasing speed.
Table of Contents
- What Is Area Model Multiplication, Step By Step?
- Common Mistakes Students Make (and How to Catch Them Fast)
- Classroom Activities and Printables That Reinforce the Model
- Why the Area Model Actually Works
- Practice With Free Interactive Tools
- Extending the Area Model to Decimals and Bigger Numbers
- Area Model vs. the Standard Algorithm: When to Use Each
- Scaffolding and Differentiation for Diverse Learners
- A Teacher’s Notes on Making the Area Model Stick
- Ready-to-Use Worksheets for Your Next Multiplication Lesson
- Sources
What Is Area Model Multiplication, Step By Step?
Area model multiplication works because a rectangle’s area equals its length times its width. Split each factor into tens and ones, and the rectangle splits into smaller boxes you can add up.
Here’s the process, broken into repeatable steps:
- Partition each factor by place value. For 23 × 15, that means 23 = 20 + 3 and 15 = 10 + 5.
- Draw a rectangle and split it into a grid. One factor’s parts label the top edge, the other’s label the side edge.
- Fill each box with its partial product. For 23 × 15, you get four boxes: 20×10, 20×5, 3×10, and 3×5.
- Add every box together, watching for carries the same way you would in the standard algorithm.
A simple 1-digit example shows the logic before you scale up. For 6 × 7, partition 7 into 5 + 2. Draw a rectangle split into two boxes: one is 6×5 (30), the other is 6×2 (12). Add them: 30 + 12 = 42.
Now the full 2-digit version, 23 × 15:
- Partition: 23 = 20 + 3, and 15 = 10 + 5
- Box 1: 20 × 10 = 200
- Box 2: 20 × 5 = 100
- Box 3: 3 × 10 = 30
- Box 4: 3 × 5 = 15
- Sum: 200 + 100 + 30 + 15 = 345
That total lines up exactly with the standard algorithm’s answer, but the area model shows why each digit lands where it does. When students later stack 23 × 15 vertically, the 15, the 100, the 200, and the 30 correspond to the same partial products they just calculated in the grid. That connection is what makes the BBC Bitesize worked examples so useful. Their 27 × 48 example follows the identical four-box structure, just with bigger numbers.
Common Mistakes Students Make (and How to Catch Them Fast)
The most frequent error isn’t a math mistake at all. It’s an incomplete diagram. A student partitions both factors correctly but only draws two boxes instead of four, so one partial product vanishes before the addition step even starts.
Watch for these specific breakdowns:
- Missing partial products. Count the boxes before checking the math. A 2-digit by 2-digit problem always needs exactly four.
- Addition errors after partitioning. Kids compute each box correctly, then add the totals wrong because they lose track of place value during regrouping.
- Mislabeled sides. If the tens and ones labels don’t match the actual digits, every box downstream is wrong even though the arithmetic inside it is fine.
- Confusing arrays with area models. An array shows individual units in rows and columns; an area model shows grouped regions. Arrays work well for small numbers under 10, but they get unwieldy fast. Switch to the area model once numbers exceed single digits.
A quick diagnostic question does more than any worksheet correction. Ask, “Which sub-rectangle gives you the tens? Show me that area.” If a student can point to the right box and explain what it represents, they understand the structure. If they can’t, the diagram was copied without comprehension, and that’s worth catching before moving to timed drills.
Pro Tip: Have students label each box with its multiplication fact before filling in the number. Writing “20 × 10” inside the box, then solving it, cuts down on skipped-box errors more than any other single habit.
Classroom Activities and Printables That Reinforce the Model
Low-prep doesn’t mean low-value. A few quick tasks build the same skill a full worksheet does, just faster.
- Draw-and-check pairs. Give partners a multiplication problem; each draws the area model separately, then compares grids before checking the sum.
- Base-ten block stations. Use flats, longs, and units to physically build a rectangle for something like 14 × 12, then translate the blocks into a drawn area model.
- Tiered worksheets. Start some students with pre-drawn, partially labeled grids. Move others to blank grids they partition themselves. Challenge advanced students with 3-digit factors or decimals.
Matching the right printable to the right moment saves prep time. The table below maps common lesson goals to resources that fit.
| Lesson Goal | Recommended Resource |
|---|---|
| Introducing what multiplication represents before drilling facts | Multiplication: What It Really Means course and worksheets |
| Grade-level practice sets for 2-digit by 2-digit problems | 3rd Grade Math Worksheets pack |
| Building fact fluency alongside area-model practice | Times Tables & Multiplication infographic course |
Base-ten manipulative work draws directly from the approach Annenberg Learner recommends for building the partial-product algorithm through hands-on counting rather than memorized steps.
Why the Area Model Actually Works
The area model isn’t a shortcut or a trick. It’s the distributive property drawn as a picture. Algebraically, (a + b)(c + d) expands to ac + ad + bc + bd, and each of those four terms is exactly one box in the grid. The 20 in 23 becomes the “a,” the 3 becomes the “b,” and the same pattern holds for the second factor.
The area model represents multiplication as the area of a rectangle. Partitioning each factor into place-value parts produces partial products that sum to the final answer, the same logic that later supports algebraic expansion of binomials.
That’s the framing the National Council of Teachers of Mathematics uses when connecting elementary place value to algebra years before students see a variable. The same grid structure that solves 23 × 15 in third grade solves (x + 3)(x + 5) in ninth grade. Nothing about the method changes, only the labels on the sides of the rectangle.
Practice With Free Interactive Tools
Screen-based practice works best when it’s guided, not just handed to a student to click through alone.
- Run a short PhET demo first. Project the PhET Area Model Multiplication simulation and let one student drag the partitions while the class predicts each partial product before it appears.
- Follow with independent exploration. Give students two or three problems to solve on the simulation, then a printable worksheet covering the same problems so they translate digital manipulation into written work.
- Try a partition race. Two students get the same problem; whoever labels all four boxes correctly first wins the round.
- Run a partial-product relay. Teams pass a whiteboard down the row, each student solving one box before passing it on.
Pairing the simulation with paper practice matters more than either tool alone. Digital manipulation builds intuition fast, but writing the partial products out is what sticks during a timed assessment.
Extending the Area Model to Decimals and Bigger Numbers
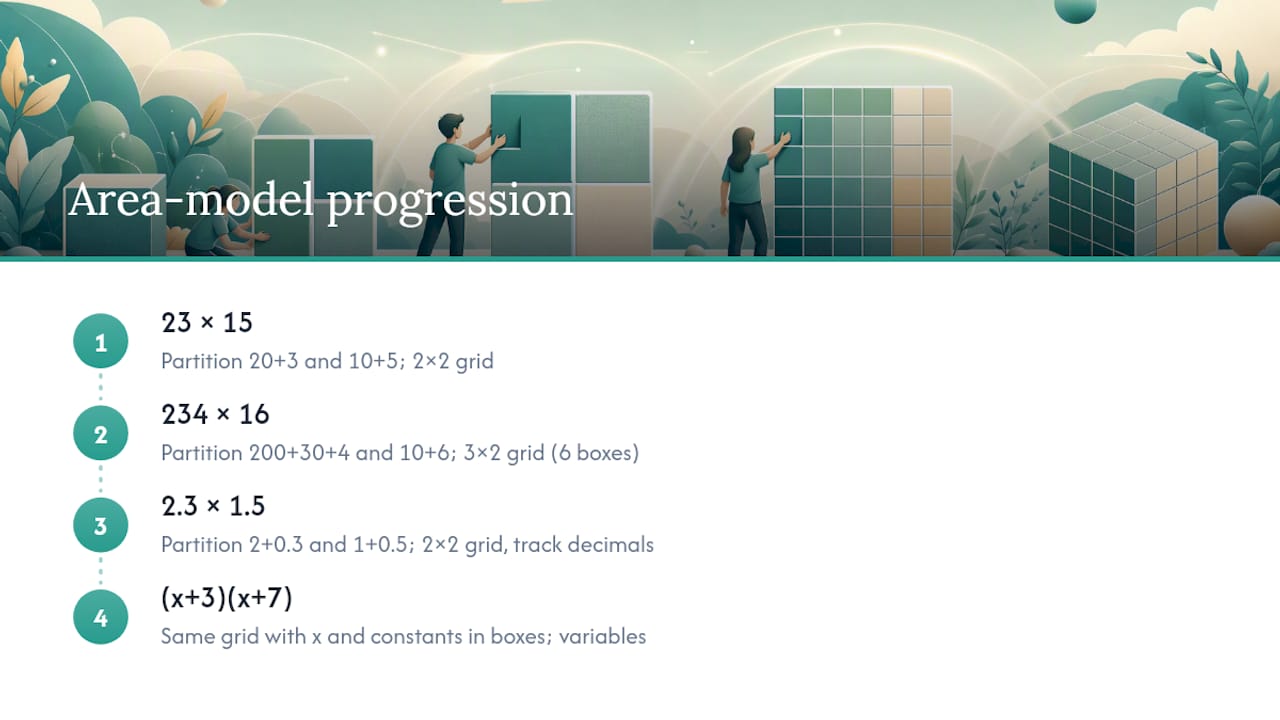
The same grid structure that handles 23 × 15 scales up to three-digit factors and decimals without changing the underlying logic. For a problem like 234 × 16, partition 234 into 200 + 30 + 4 and 16 into 10 + 6. That produces a 3-by-2 grid with six boxes instead of four, and the addition step just has more terms to combine.
Decimals follow the identical partitioning rule, just with different place values. For 2.3 × 1.5, split 2.3 into 2 + 0.3 and 1.5 into 1 + 0.5. The four boxes become 2×1, 2×0.5, 0.3×1, and 0.3×0.5, and students add the results the same way they would for whole numbers. The only extra step is tracking the decimal point through each partial product, which is exactly where the visual grid earns its keep. Students who try decimal multiplication purely by memorized rule often misplace the decimal; students who partition visually can check that 2 × 1 gives roughly the right magnitude before finalizing an answer.
OpenStax’s Algebra 1 materials push this even further, using area models to multiply algebraic expressions like (x + 3)(x + 7). The grid stops needing actual numbers at all. Once students have partitioned whole numbers and decimals enough times, the jump to variables in the boxes feels like a small step rather than a new concept. That’s the real payoff of teaching the model early: it’s reusable across four or five years of math instruction, not a one-unit trick.
Area Model vs. the Standard Algorithm: When to Use Each
The area model and the standard column algorithm produce identical answers through different paths, and each has a place in instruction. The area model makes every partial product visible, which is exactly what a student first learning multi-digit multiplication needs. The standard algorithm is faster once a student has internalized why it works, but it hides the place-value reasoning behind carried digits and zeros.
Use the area model when a student is new to multi-digit multiplication, struggles with regrouping, or needs to see why the answer makes sense rather than just how to compute it. It’s also the stronger choice when previewing algebra, since the same grid later multiplies binomials.
Switch toward the standard algorithm once a student reliably produces correct area models and can explain each box. Speed matters on timed assessments, and the column method takes less space and fewer steps once the underlying concept is secure. Many teachers run both side by side for a stretch: solve a problem in the area model, then immediately solve the same problem in the standard algorithm, and ask students to match each partial product to its corresponding step in the column method. That comparison does more for retention than teaching either method in isolation. Neither approach replaces the other outright. The area model builds the reasoning; the standard algorithm builds the speed.
Scaffolding and Differentiation for Diverse Learners
Not every student is ready for a blank four-box grid on day one, and building in support levels prevents frustration without slowing down students who are ready to move faster.
Start struggling learners with pre-drawn grids where the partitions are already labeled, so the only task is filling in each partial product. Once that’s solid, remove the labels but keep the grid lines. Finally, hand over a blank rectangle and let the student partition it entirely on their own.
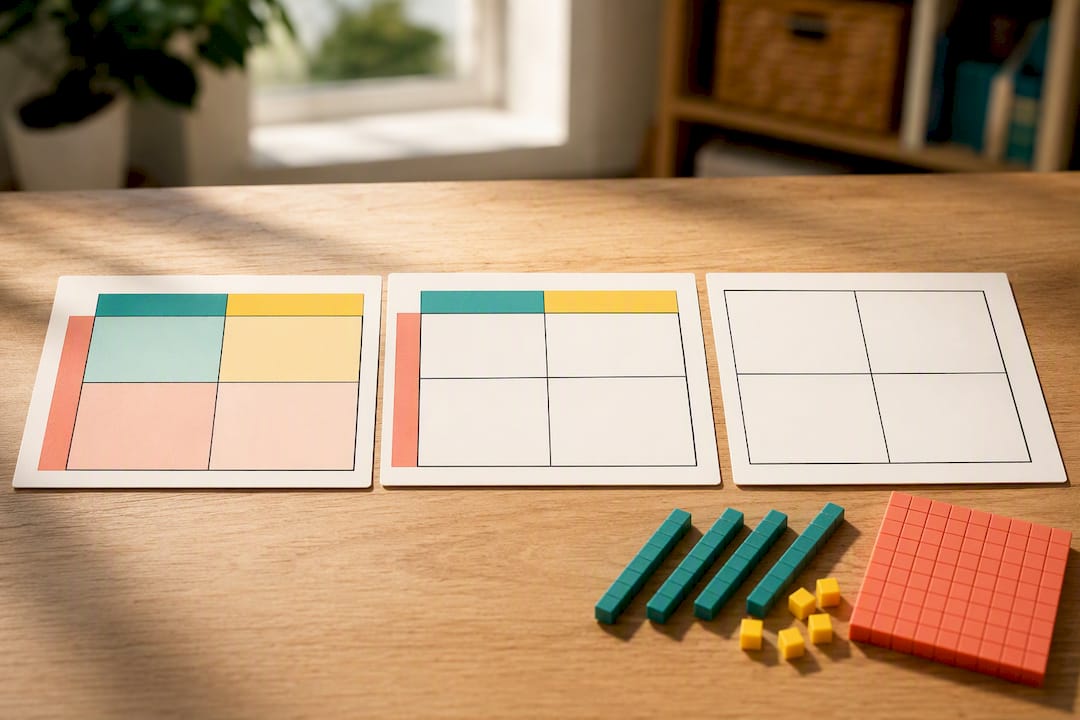
For students who need more concrete support, base-ten blocks or grid paper turn the abstract rectangle into something they can physically build before drawing it. Students who process language more slowly benefit from sentence starters like “The tens box shows ___ times ___” to structure their explanations during formative checks.
For advanced learners, push into three-digit factors, decimals, or algebraic expressions well before the rest of the class gets there. The MathWords definition of the area model notes explicitly that the same structure applies to multiplication, division, fractions, and algebra, which gives you a natural menu of extensions for students who finish early. Differentiation here isn’t about giving different work; it’s about adjusting how much of the grid the student builds independently.
A Teacher’s Notes on Making the Area Model Stick
The area model earns its place in a lesson sequence the moment a student who’s been guessing at multiplication suddenly points to a box and says, “that’s the tens.” That single moment of recognition is worth more than a week of drilled facts without understanding.
Three habits separate classrooms where this method sticks from ones where it becomes another confusing worksheet. Do label every box with its multiplication fact before solving it. Do connect the grid to the standard algorithm explicitly, every time, so it reads as a bridge rather than an extra step. Don’t rush students to the standard algorithm before they can explain their own grid.
A quick checklist before moving on: can the student partition both factors correctly, count all the required boxes without prompting, and explain what one box represents in their own words? If yes to all three, they’re ready for faster methods.
— Shaun
Ready-to-Use Worksheets for Your Next Multiplication Lesson
Building area model grids from scratch every week eats up planning time you’d rather spend on instruction. Downloadable packs give you the grids, the worked examples, and the practice sets already built, so you can print and teach the same day instead of drafting problems at 10 p.m.
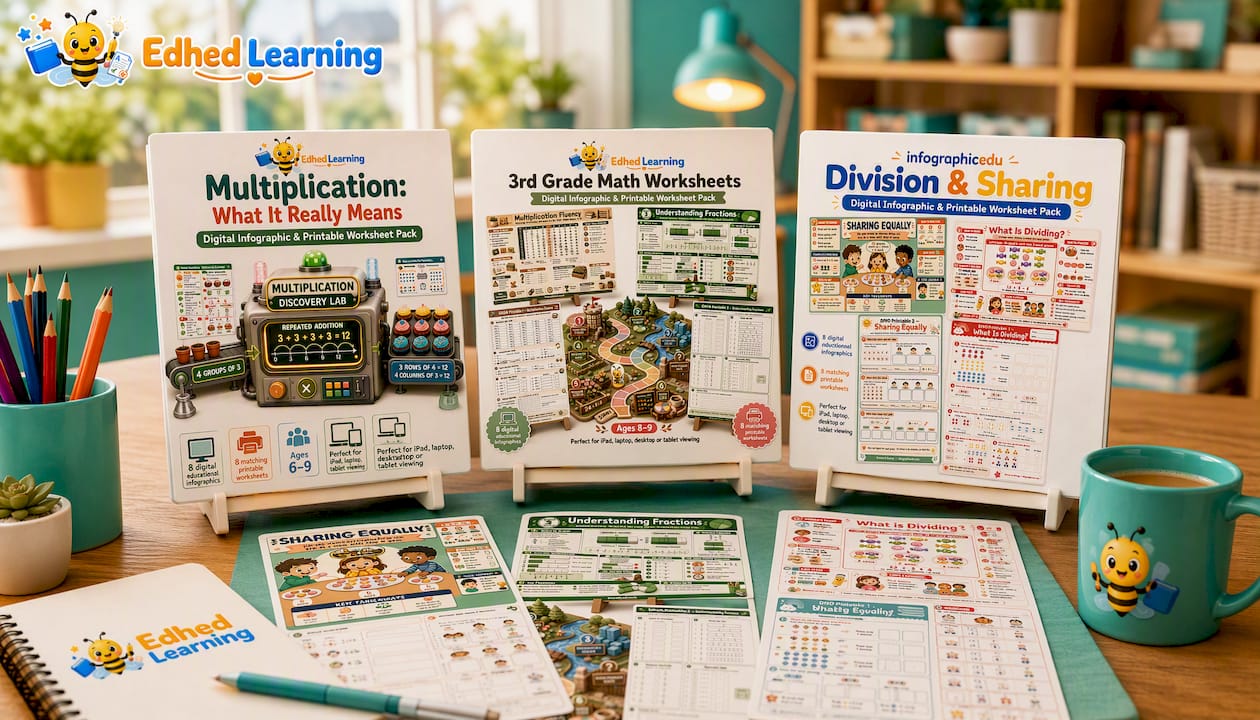
For a lesson introducing what multiplication actually represents before diving into partial products, the Multiplication: What It Really Means resource pairs an infographic explanation with printable practice, ideal for the first day you introduce area models. If your class is working through a 23×15-style lesson and needs graduated practice, the 3rd Grade Math Worksheets pack includes partitioning practice at a difficulty level suitable for third and fourth graders. Once students have the multiplication side solid, the Division & Sharing pack extends the same visual thinking to the inverse operation.
Every pack downloads instantly, so you can pull up tonight’s lesson plan and have printable practice ready before tomorrow’s class starts.
Sources
- The Area Model for Multiplication - National Council of Teachers of Mathematics
- Meanings and Models for Operations Part B: Area Models for Multiplication and Division (Annenberg Learner)
- Multiplication using the area model - KS2 (BBC Bitesize)
- Area Model Multiplication - PhET Interactive Simulations


